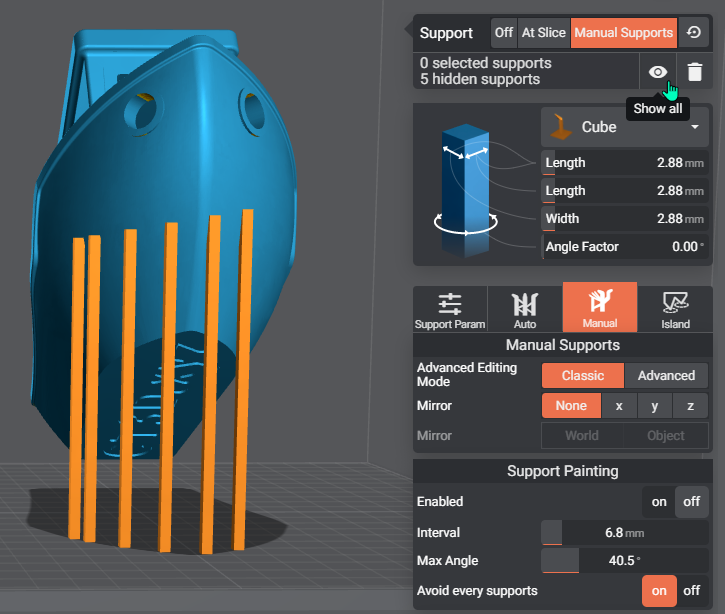
In the Manual menu, you will find 3 different tools you can use individually or combined, to save you time and for added precision.
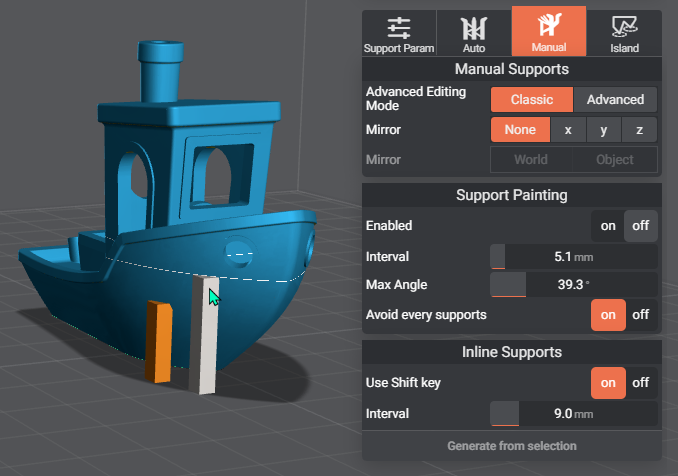
Manual Supports
You have 2 modes: Classic and Advanced Editing Mode.
In Classic mode, you can just point and click on the model to add the Supports.
Advanced Editing Mode gives you the possibility to change your support settings by manipulating the support itself directly.
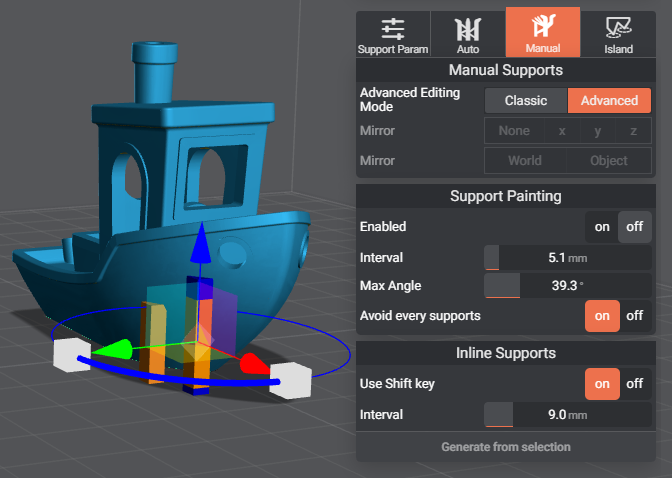
The space bar is your keyboard shortcut to come in and out of the Advanced mode quickly.
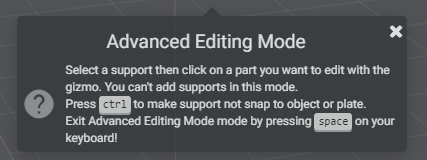
The Gizmo of the Advanced Editing Mode allows you to change the Support settings manually and the modifications that you make on the supports already added to the object, will automatically be updated in the Support settings.
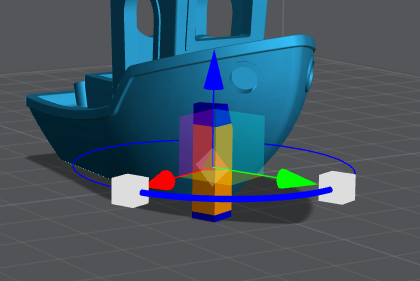
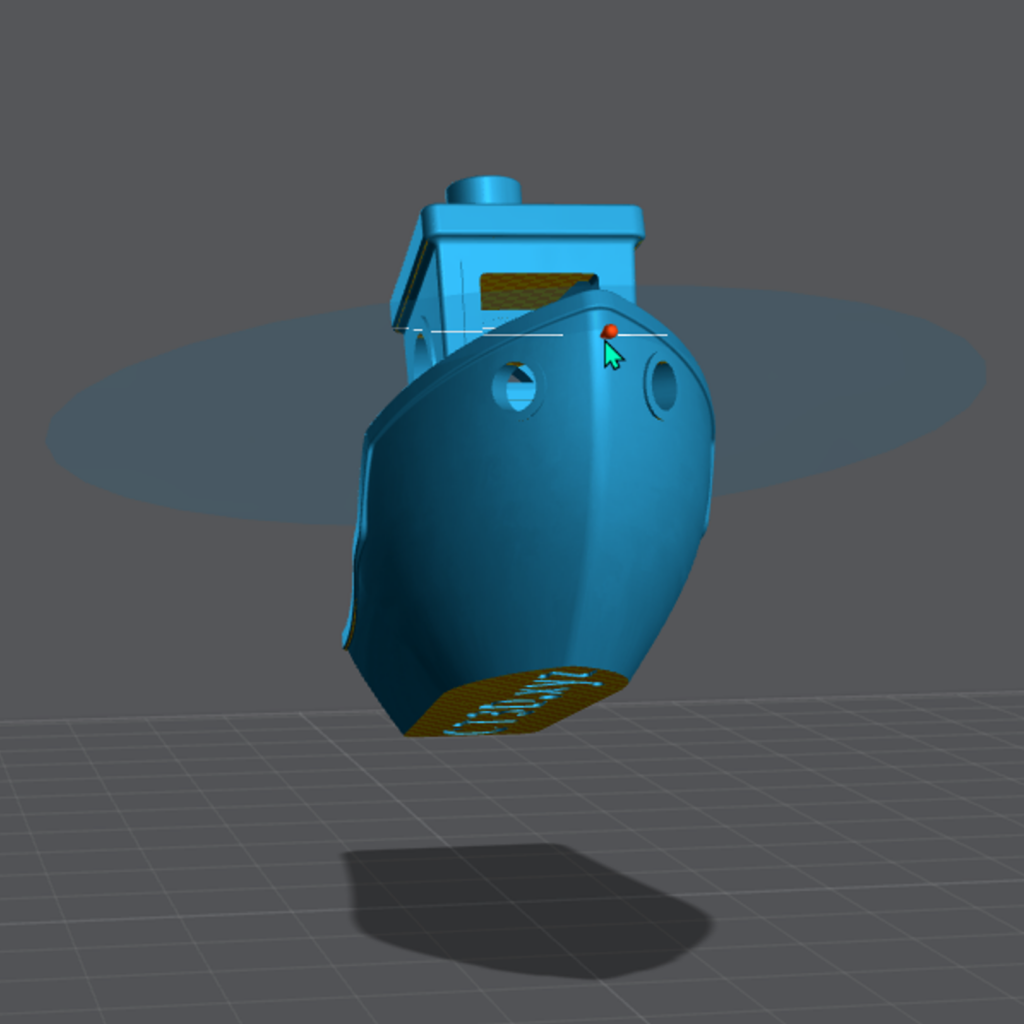
Mirror
Mirror gives the option to add mirrored supports.
You can chose to mirror on 3 axes X, Y and Z. A transluscent blue disc will indicate the Axe that is mirrored.
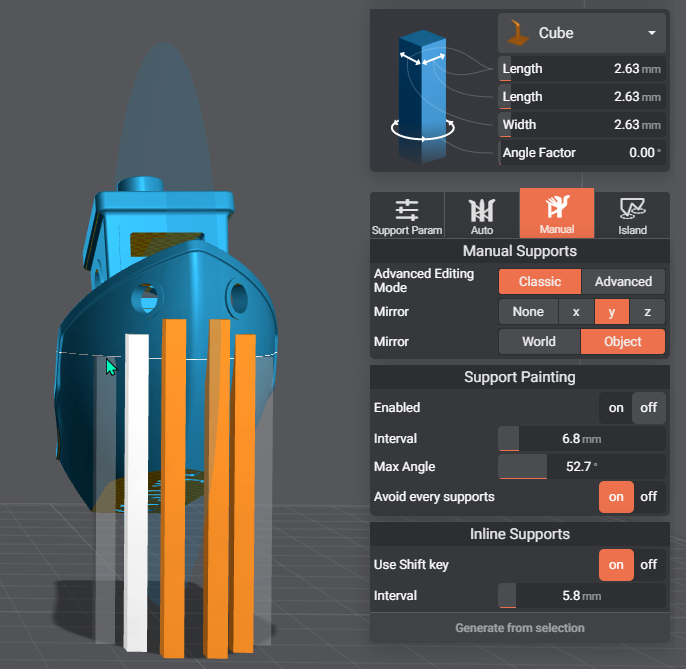

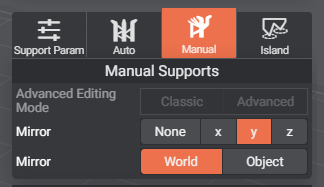
Object Mirror: the mirroring effect is applied to the object.
World Mirror: the mirror is relative to the XYZ axes of the printer and not the object itself.
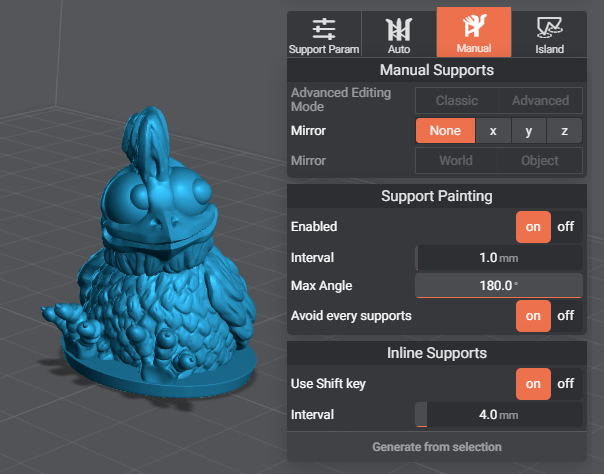
Support Painting
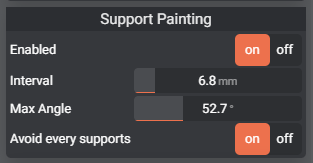
You can enable Support Painting by turning it on in the menu.
You can change the Interval. This is the spacing between your supports
You can also set the Max Angle. Supports won’t be painted on surfaces at an angle above the degree selected.
Avoid every supports will ensure you don’t paint on supports you might have added manually before using Support Painting.
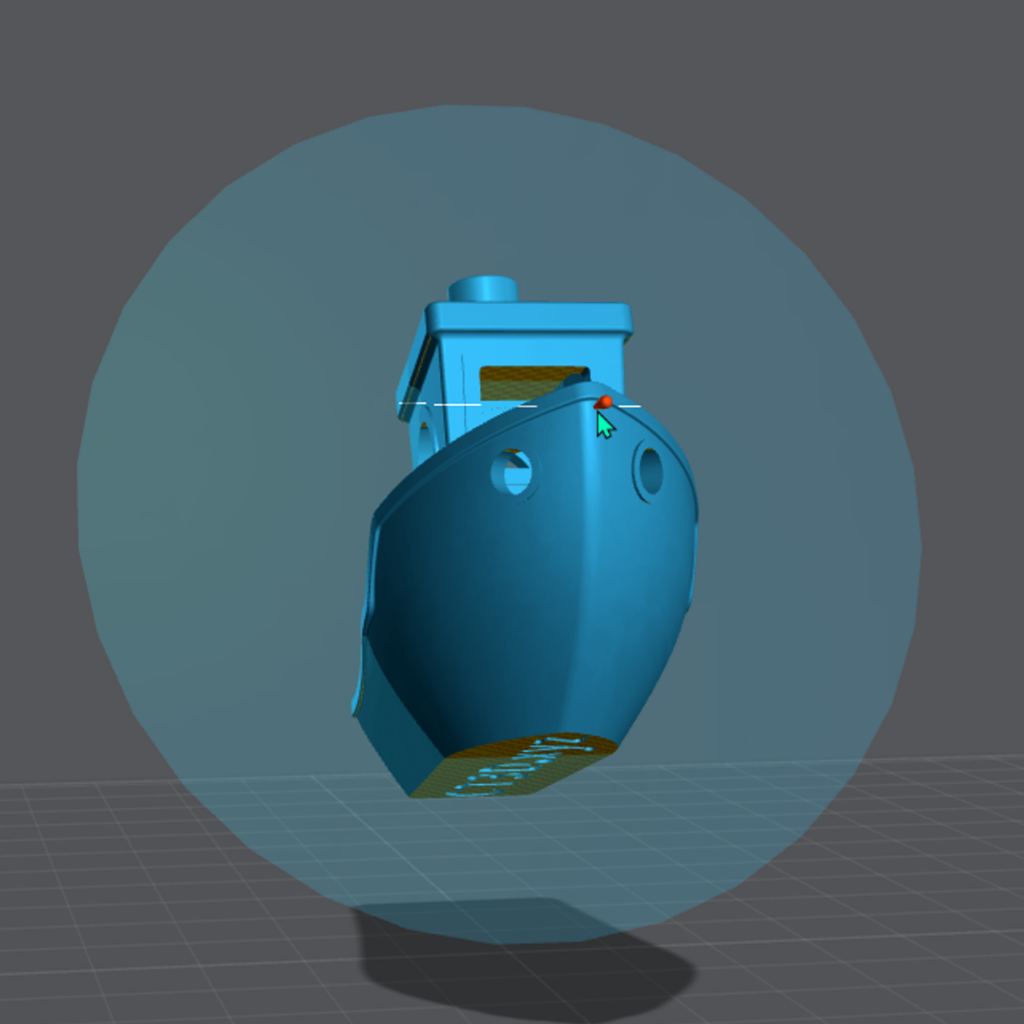
To paint your supports, click and drag your cursor on the model to paint on the area you would like your supports to be added.
You can easily combine the Mirror tool and Painting Support :
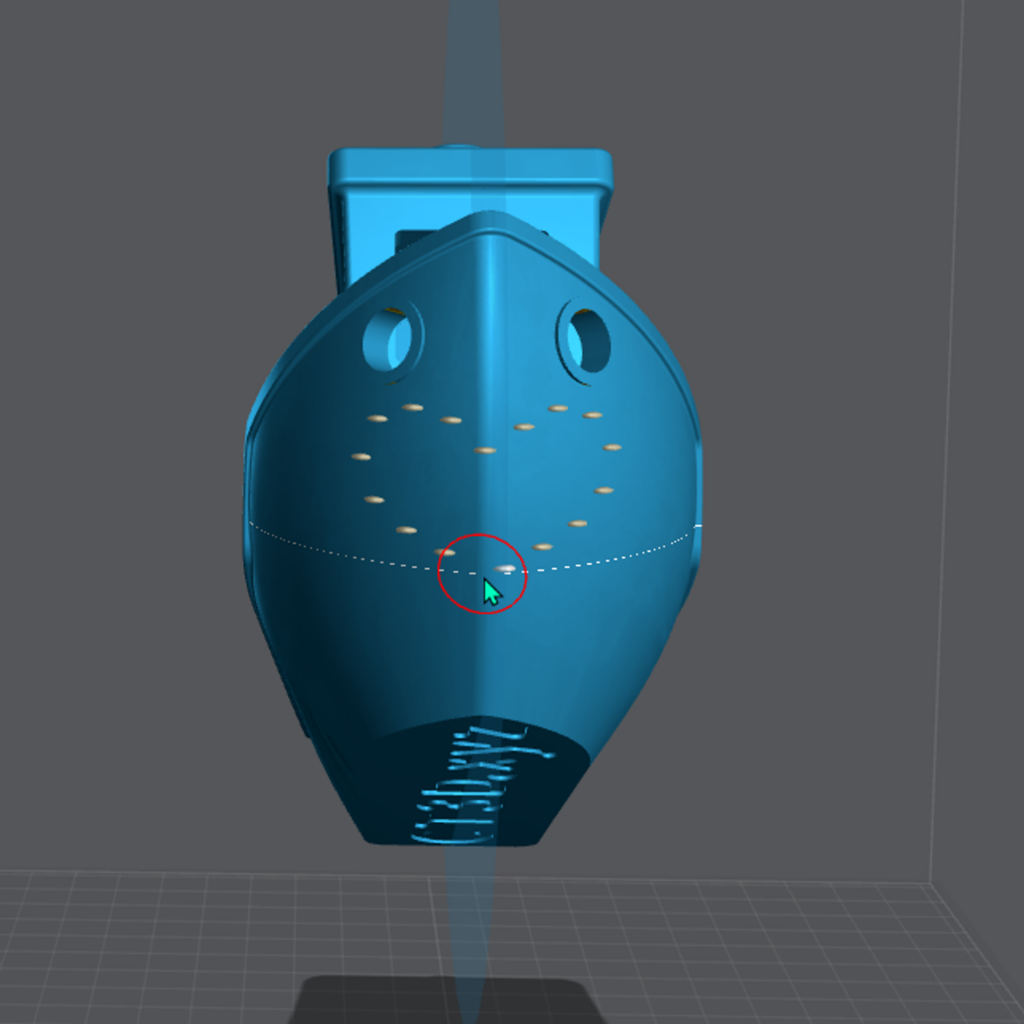
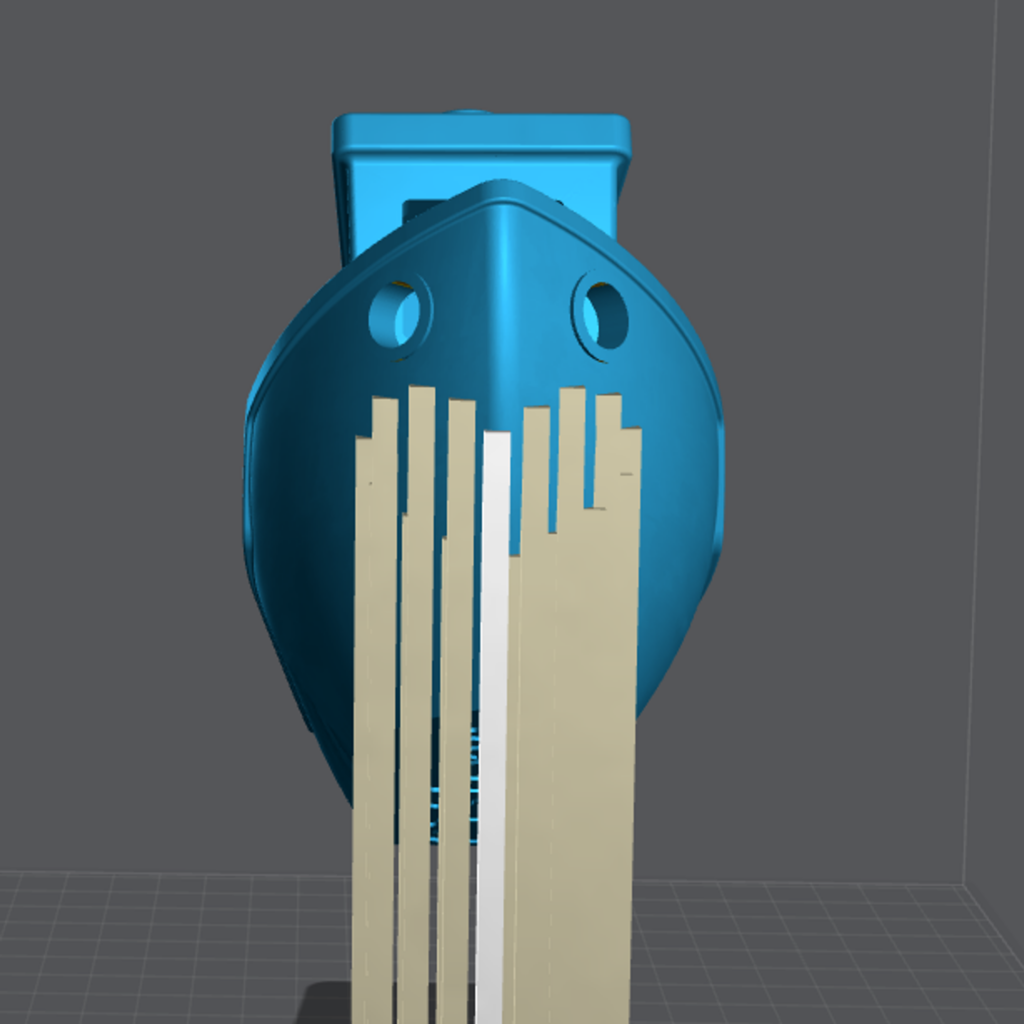
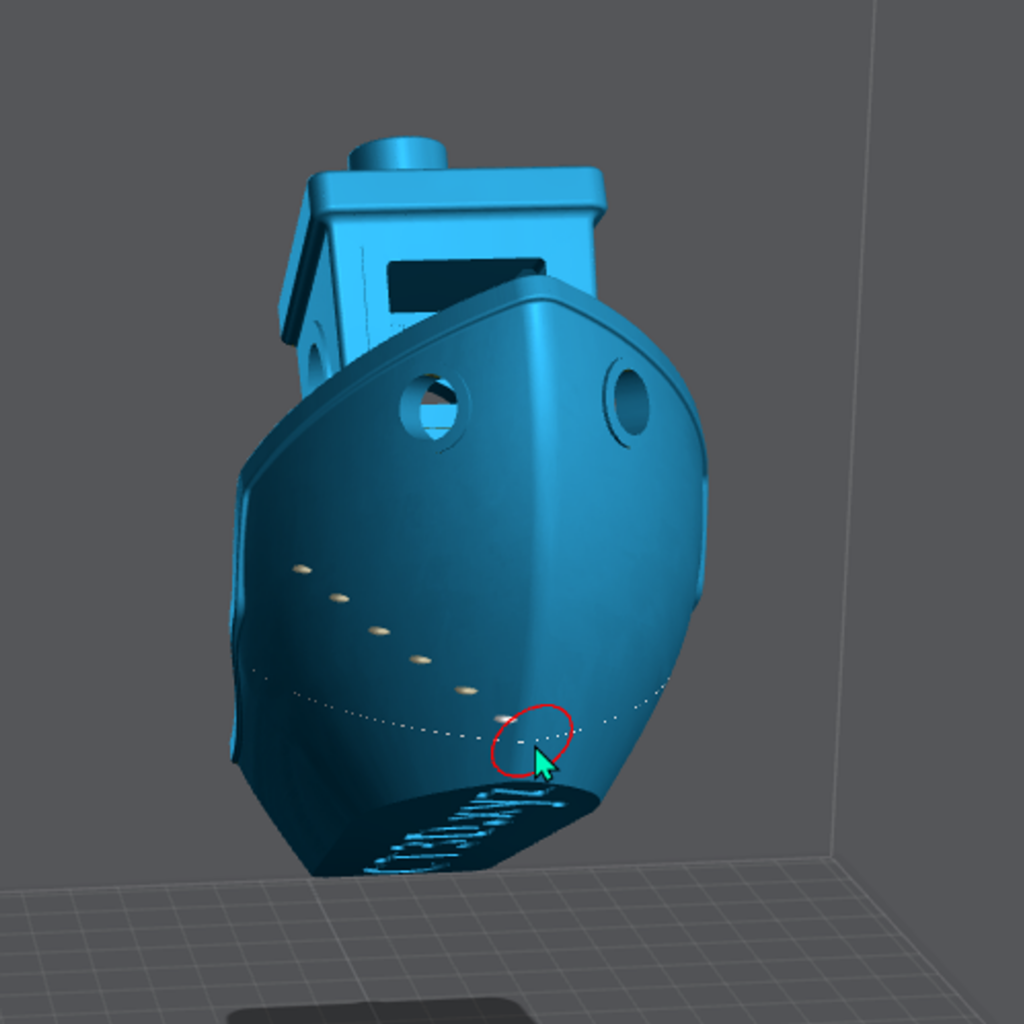
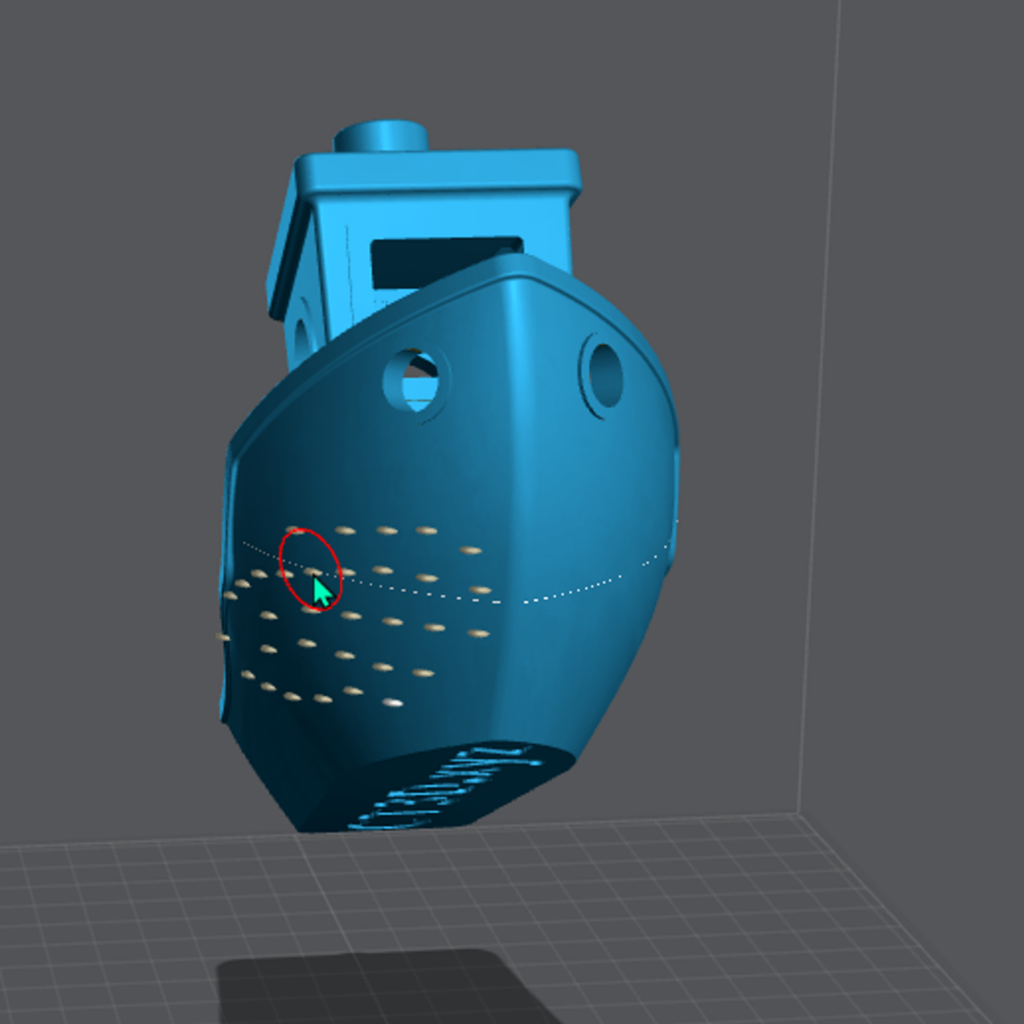
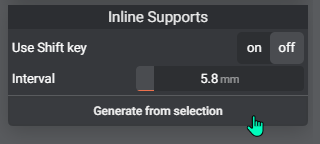
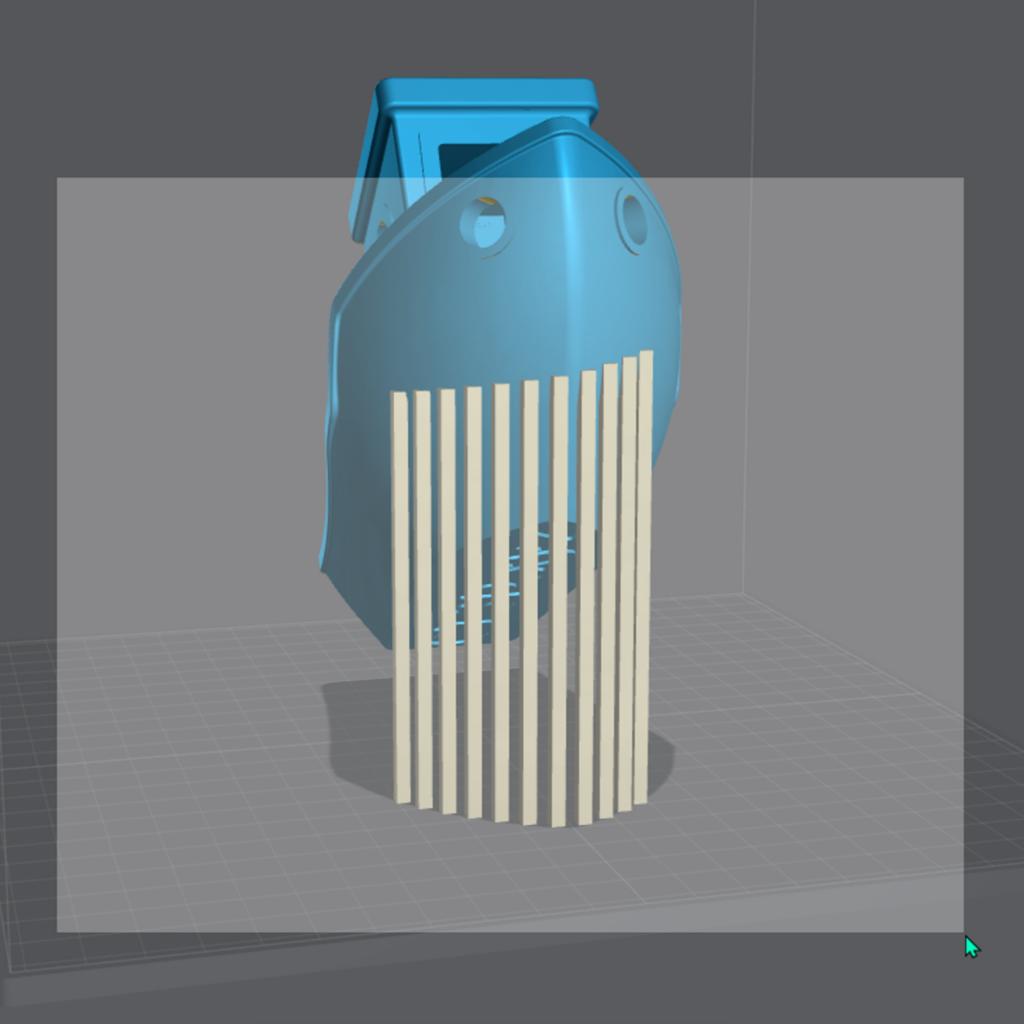
Inline Supports
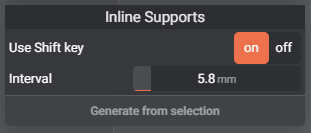
Just like with Support Painting, you can change the supports Interval in the setting.
You can use Inline Supports in 2 ways :
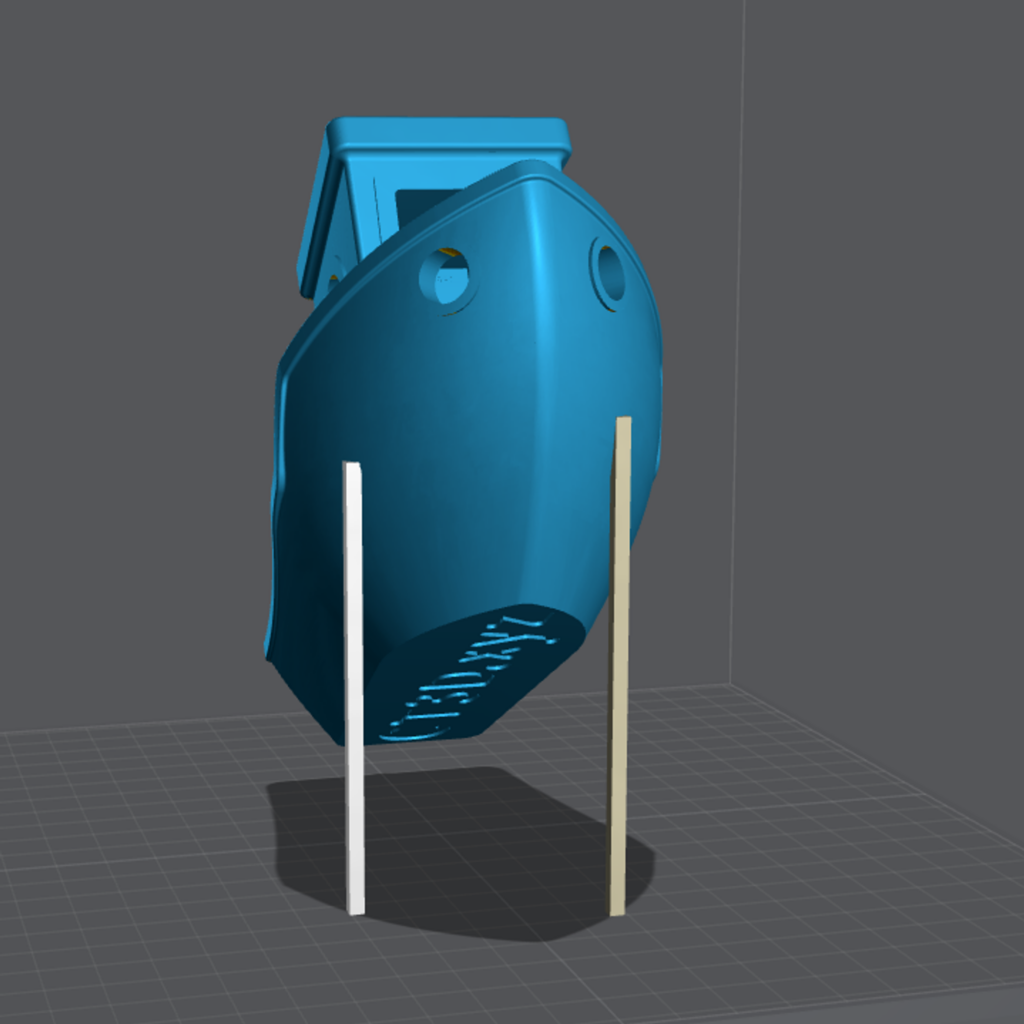
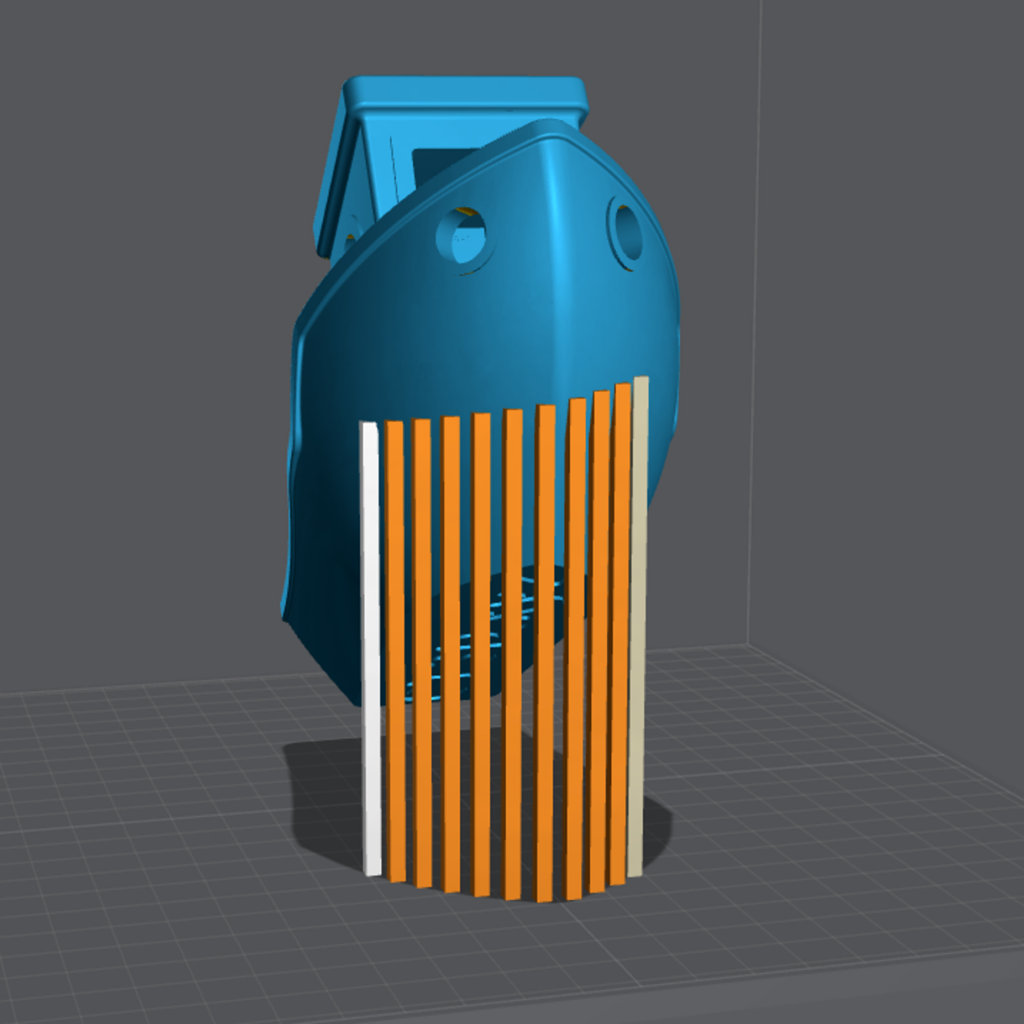
- Put a manual support on the model then press SHIFT and move your cursor to another point. The dots that appear show the line of supports that will be added. Click on the point and release to add the supports.

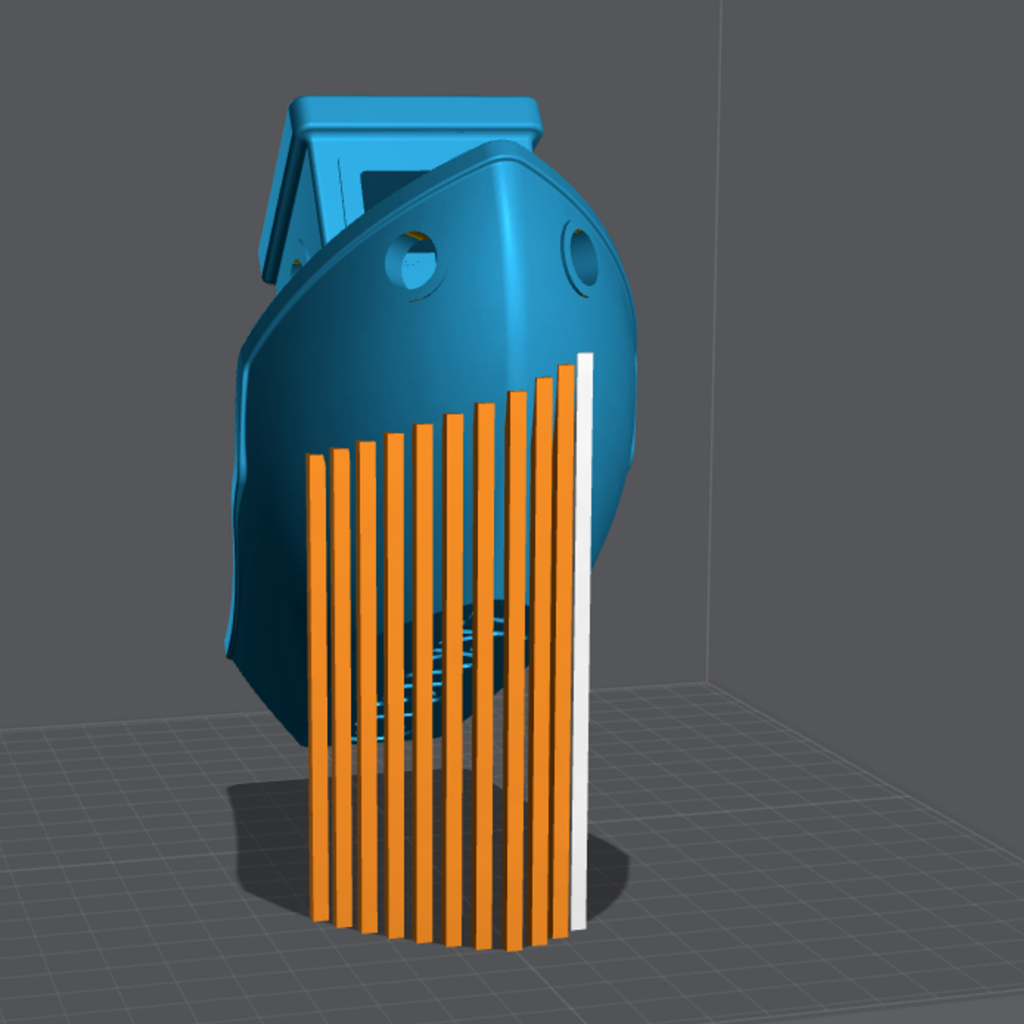
- Turn Use the Shift Key OFF
To Undo supports use CTRL-Z and to Delete supports quickly, select the supported area by clicking and dragging your cursor over the supported area where you wish to remove the supports and press DELETE.
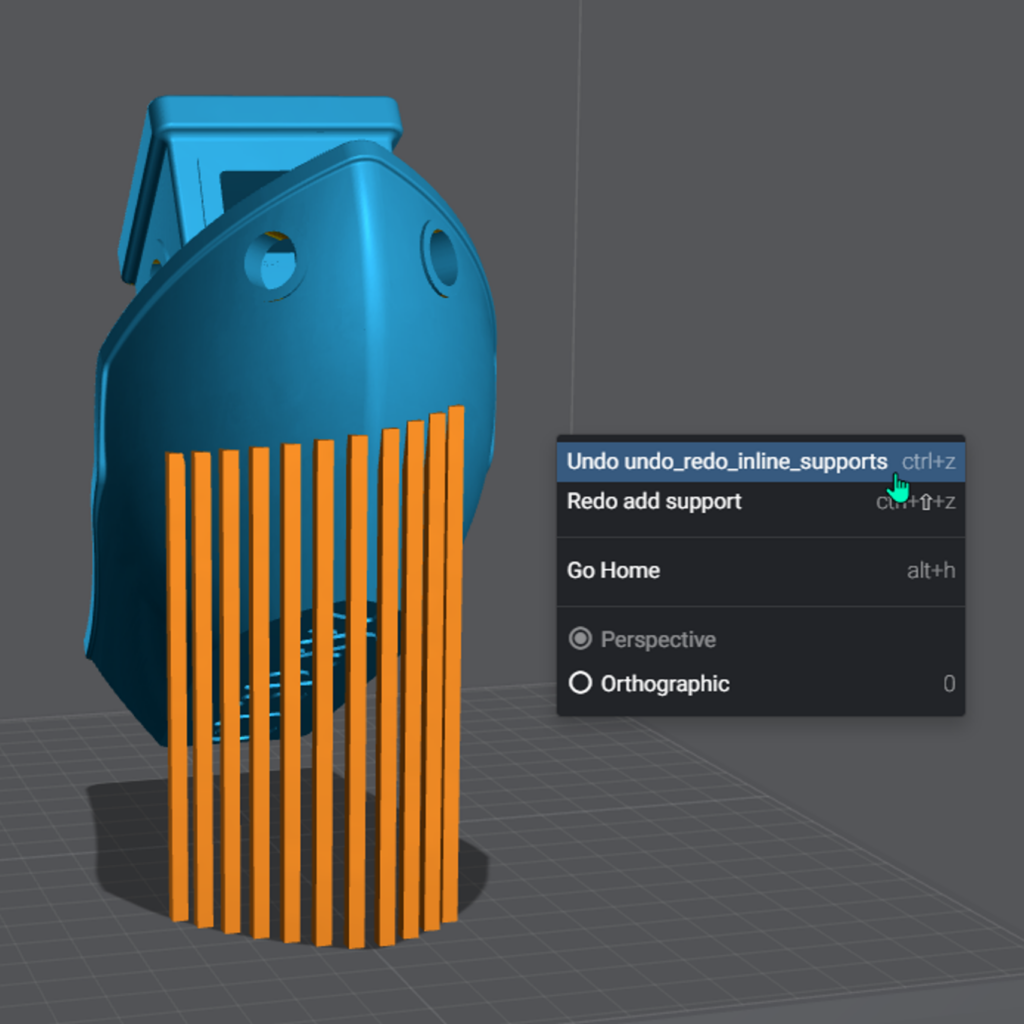
You can also right-click on your project and select Undo.
You can also see how many supports you have selected, hide selected supports or delete selected supports from the top menu.
Last updated on
Tags: Advanced, FDM, Free, Manual, Premium, Prepare, Pro, Supporting