What’s the CTB v4 file format?
This is an export file format for the compatible printers which use a ChituSystem motherboard.
Which printers are compatible with the CTB v4 file format?
New printers require it: Elegoo Mars 3, Epax E10 5K, Peopoly Prime, Phrozen Mega 8K, Phrozen Mini 8K, and more to be released.
Some older printers like the Elegoo Saturn and Mars 2 Pro with updated firmware can access this new file format and gain new features like the Two-Stage Motion Control.
Please check the list of printers that can be upgraded through a firmware update (https://www.chitubox.com/en/download/chitubox-free#firmwareList )
Note that they can still print files using CTB v3 even after the update if needed. The CTB version used during the export is defined in the printer settings, not the resin settings in Other parameters.

What’s new in the CTB v4 file format?
1. Two-Stage Motion Control or TMSC
The TMSC allows you to reduce the total print time while ensuring you a reasonable success rate.
The lifting and lowering sequences of the model are now separated into two sub-stages, each having a height and a speed.
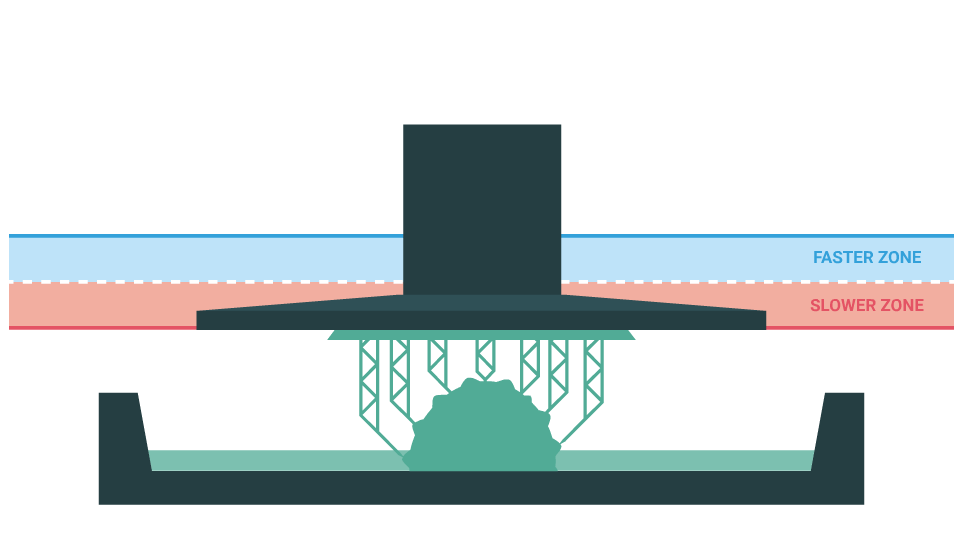
Lifting phase: – first, slower zone to allow the print to separate securely from the vat.
– then a faster zone to save print time.
Lowering phase: – first, a fast zone to lower and save print time.
– then a second phase, much slower to let the object enter the resin with less disturbance and protect the weakest features of the print, thin layers, extended support…
How to setup in Lychee Slicer:
First, turn ON the TSMC option in the Global Parameters.
Then you will have to change the parameters in the Burn-In Layers and the Normal layers section.
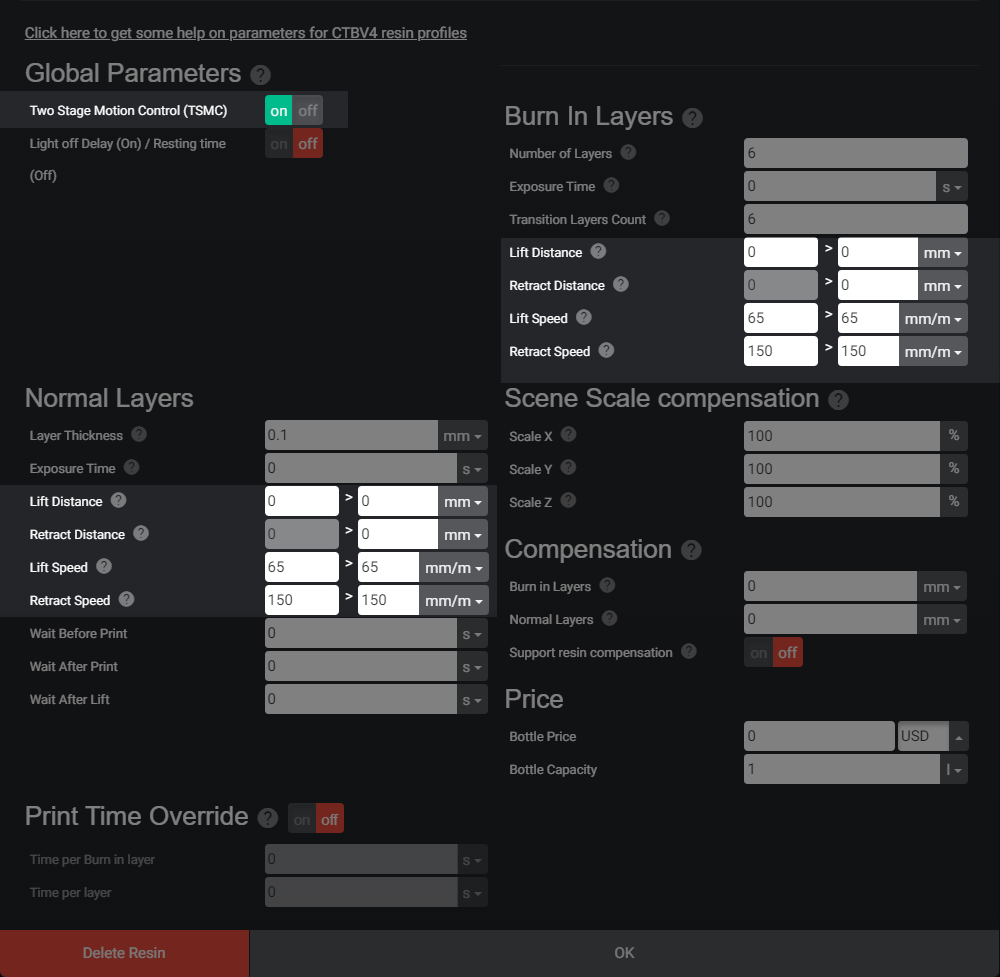
Lift Distance: From left to right, the cells correspond to the Slower Zone lifting distance then the Faster Zone distance during the lifting.
Retract Distance: From left to right the cells correspond to theFaster Zone lowering distance (grayed out), then the Slower Zone distance during the lowering
Note that one of the cells is always grey out. The parameter is automatically calculated based on the next cell value.
Lift Speed: From left two right the cells correspond to the Slower Zone lifting speed then the Faster Zone speed during the lifting.
Retract Speed: From left two right the cells correspond to the Faster Zone lowering speed (grayed out) then the Slower Zone speed during the lowering
A good starting point would be a total distance of 8mm, for example:
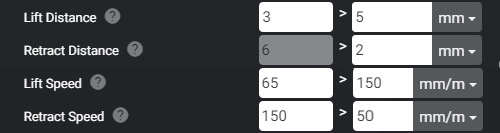
We start with a 3mm lift at 65mm/min, then 5mm at 150mm/min to save time.
Next, a lowering of 6mm at 150mm/min, then 2mm at 50mmm/min to finish the cycle.
The addition of the lifting values or the lowering values is the same, 8mm in this case.
2. Light off Delay or Resting time.
You must choose how to control the pause between each layer using the Light off Delay or the Resting time first.
Both parameters have a similar goal. Avoid having micro-movement in the resin by adding a pause time just before the UV curing. Micro movement in the resin can lead to poor surface finish and delamination.
How to setup in Lychee Slicer:
Using the Light off Delay :
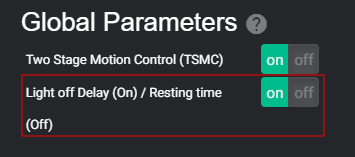
This parameter allows you to specify a halt in the printing cycle. You can turn it ON in the Global Parameters.
Light off delay = Lift time + Halt time + Lowering time + pause time.
You can calculate it based on the speed in the parameters or simply measure a period of lifting + lowering cycle and add some pause time.
The thicker the layer, the more movement you will have in the resin. You want to let the resin sit a little before flashing it.
Depending on the resin type, viscosity, and room temperature, 1s to 2s of pause time is enough to let the resin rest in the VAT. (Light off delay = Lift time + Halt time + Lowering time + pause time.)
Avoid using this parameter with CTB v4 as it has been reported to add a default value automatically and ignore the user parameter.
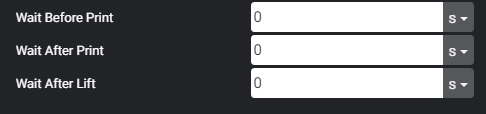
Using the Resting time :
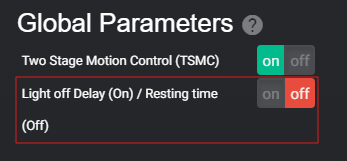
You can ask the printer to halt the cycle between each layer. You can activate it in the Global Parameters by switching it off.
Wait Before Print: A pause when the print is back into the vat after lowering.
Wait after print: A pause before the lift of the print.
Wait after lift: A pause after the lift of the print.
Simply change the time values needed in the parameters.
Like with the Light off Delay, 1s to 2s is enough depending on your print setup.
Last updated on